This is the second blog post in a mini-series about a new and exciting approach to model and serve data using CDM folders in Azure Data Lake Storage, in conjunction with Power BI dataflows. This blog post focuses on how to create those CDM folders using a set of Python classes in Azure Databricks.
This blog post is co-authored by my colleague Anton Corredoira. Don’t forget to thank him in the comments if you think this blog post is helpful!
Haven’t read part 1 of this mini-series? Read it here.
Common Data Model and Azure Databricks
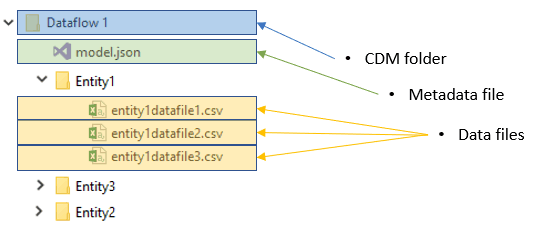
The goal is to have our data stored in the Common Data Model (CDM) format, in folders in the data lake. Each CDM folder is a combination of data files (.csv files), and a ‘model.json’ file describing the content of your folder (read these Microsoft docs for more detailed information on the CDM format). Both the data files (.csv partitions) and the model.json file can be created using Azure Databricks! One of the possible solutions to get your data from Azure Databricks to a CDM folder in your Azure Data Lake Storage Gen2 is the connector provided by Microsoft. The experience with this connector was mixed. On smaller tables it worked really well, however on a table with over 1 million rows it became buggy and started throwing errors. The connector is still under development and might improve over time. Unfortunately, we lack the Scala skills to contribute to this project. That is why Anton developed his own set of Python classes to do basic interactions with a CDM folder through Azure Databricks.
The Python solution
Let’s dive into the solution! It consists of two simple classes. First, we have the commondatamodel class. This class is used as a representation of the model.json file. All interactions with the model should go through this class. To initialize this class you pass in the name for your model, the cdm_folder (location of the mount for your CDM), and the datalake_location (full path to the location of the CDM folder mount in the data lake). The class looks for a model.json file and creates it for you if it is unable to find an existing file.
The second class is the entity class, that deals with the metadata associated with each entity within the CDM folder. The class handles adding the right attributes to the model and gathering the partition information after writing the CSV file to the data lake.
For writing to the folder (in the method write_to_cdm() of the commondatamodel class) we leverage the existing CSV writer of Spark. This provides more stability during the creation of large files. In the current setup the defaults set by Microsoft’s definition of fileFormatSettings are used. The .csv file is created without headers using “,” as a delimiter with string quoting enabled. For the date formatting we use “yyyy-MM-dd’T’HH:mm:ss’Z'”, this is the ISO8601 date format (and the CDM default). After writing the files, the names of the partition are collected and added to the model.json definition. The method add_attributes() converts the Spark data types to CDM data types and adds both the attribute names and data types to the entity definition in the model.json file. The partitions are added to the entity definition using the method add_partitions(). This method leverages dbutils to get the filenames of the partitions.
Usage
To use the classes you can follow these simple steps:
- Make sure your target file system is correctly mounted and accessible from within Azure Databricks (see the Microsoft docs for more information on how to do this). If a service principle is used, it should be granted the Storage Blob Data Contributor role on the storage account.
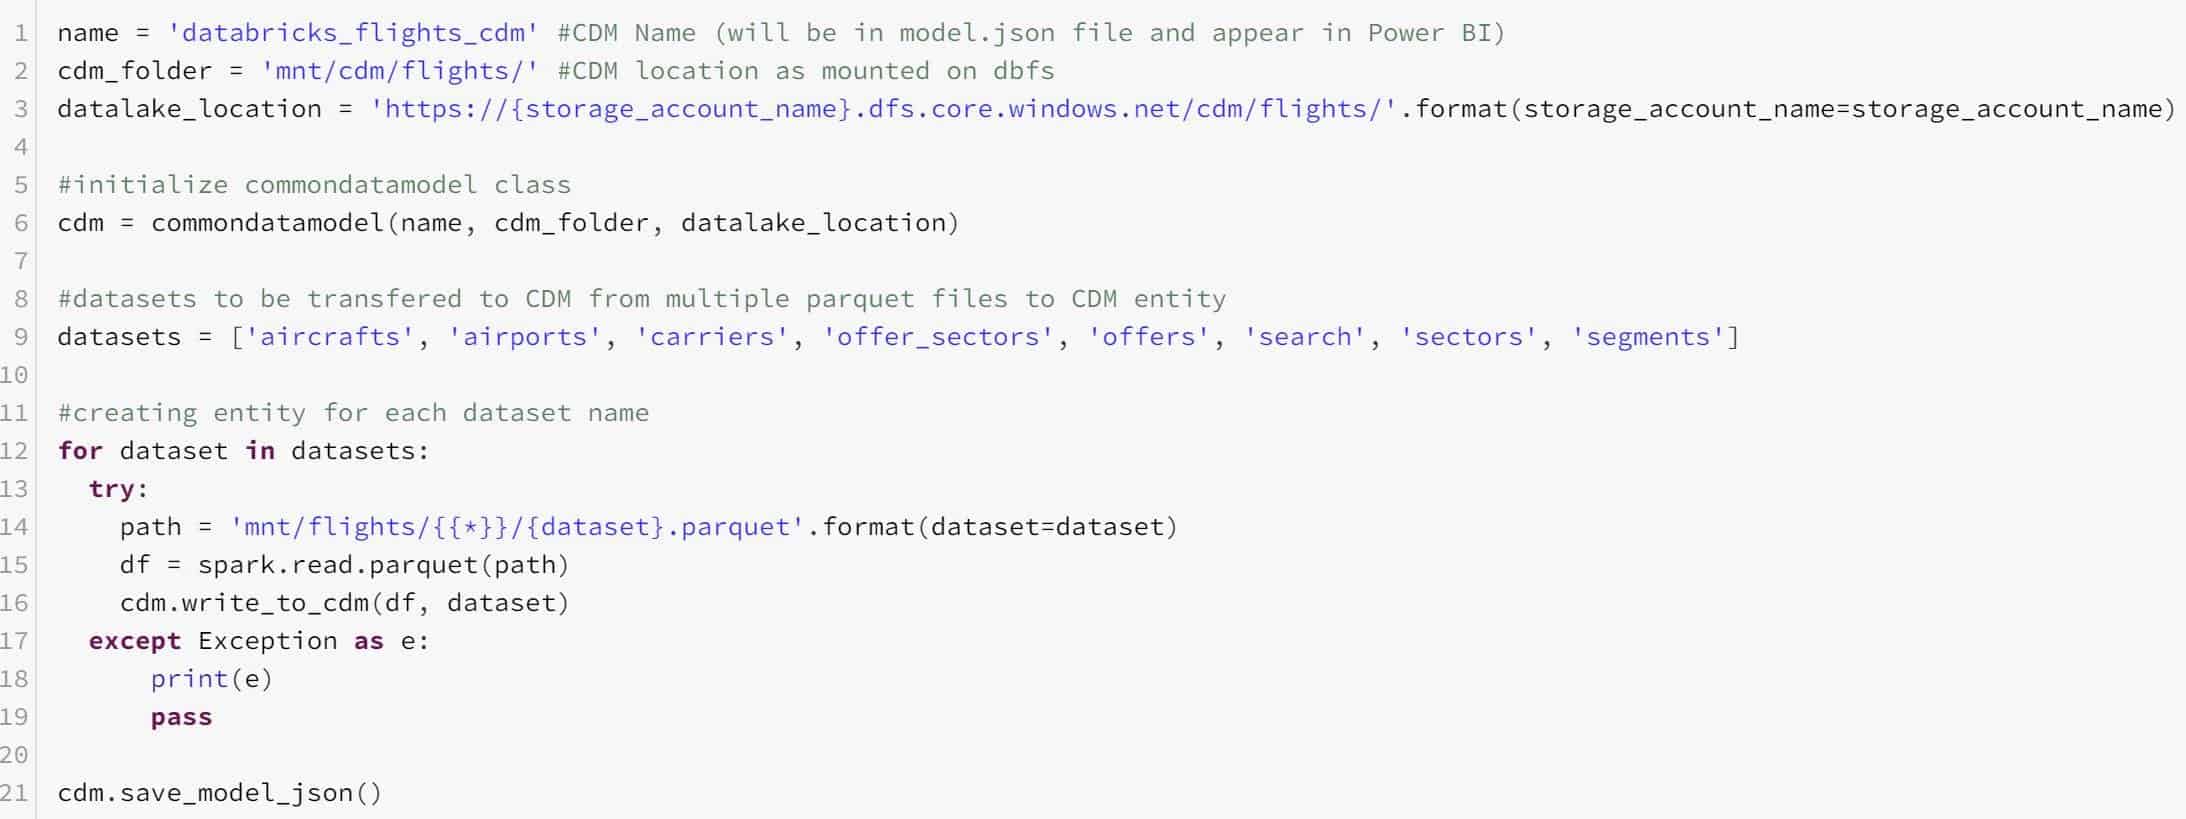
- Initialize the commondatamodel class by passing in your model name, mount, and data lake location. (e.g. ‘mnt/cdm/flights/’ as the mount location and ‘https://<your storage account>.dfs.core.windows.net/cdm/flights/’ as the full data lake file path).
- Use the write_to_cdm() method to create a new entity, this method accepts a dataframe and the name of the entity. The name of the entity will become the entity name in your Common Data Model folder. This can, for example, be used in a for loop, iterating over the tables of a Spark database. This method handles everything during the write operation.
- Use the save_model_json() method to store the updated version of the model.json file.
Anton has created a notebook with 2 sample implementation scenarios. The first sample reads directly from a wildcard folder containing parquet files and writes the data to the CDM folder. The second sample takes an entire view layer from a Databricks database and writes it to the CDM folder.
Example Python code (more code in the notebook download link further down below):
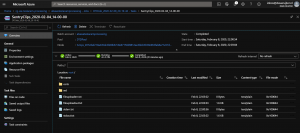
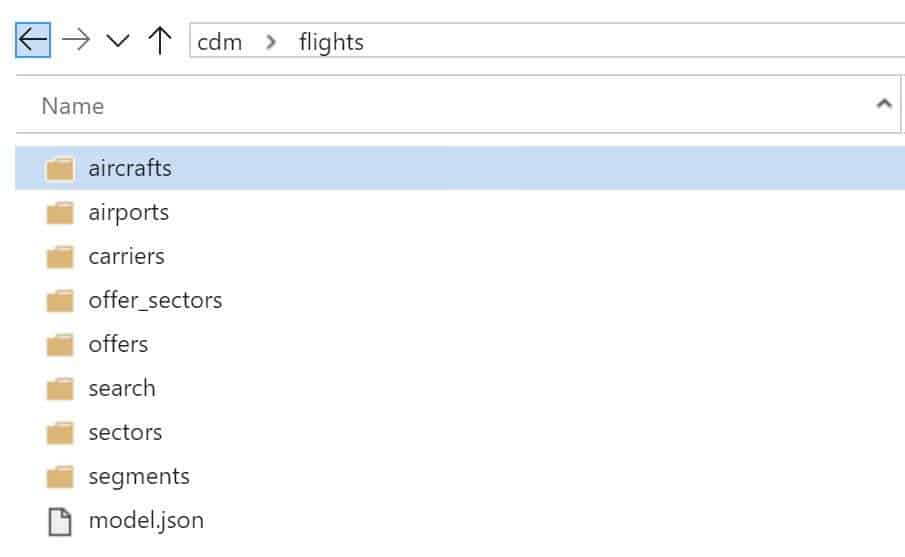
The CDM folder created in the data lake:
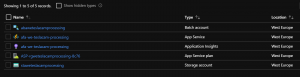
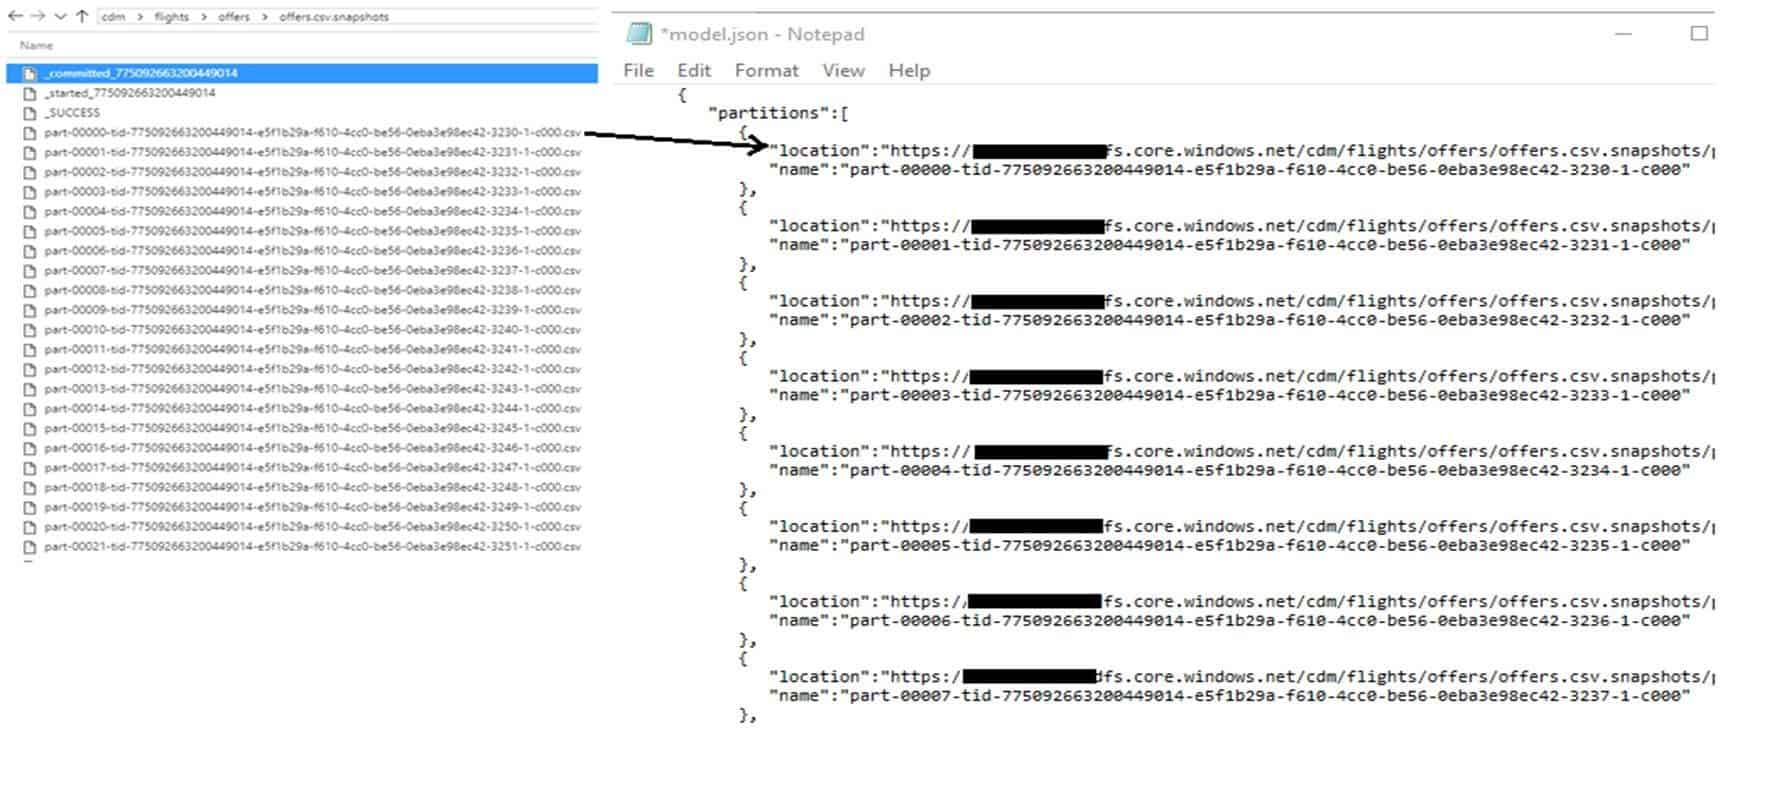
And if we zoom into the ‘offers’ entity, we can see the .csv snapshots/partitions are there:
Notebook on GitHub
Download the notebook here on my GitHub repo!
All credits go to Anton for creating this notebook.
Next steps
Of course, this work is not finished. It is, however, a good starter template on which you can expand adding your own functionality. For example, there is no support yet for linked entities, deletion of entities, etc. With a couple of small adjustments, this script can be packaged as a python wheel and get imported as a library instead of always putting the code in the first cell.
This is the essential setup and it allows you to output multiple entities to a CDM folder for further analysis, for example using Power BI dataflows.
Co-author
 This blog is co-authored by my colleague Anton Corredoira. Anton is an Azure Data Engineer at Macaw. His focus is on everything Azure and more specifically Azure Data Factory, Azure Databricks, Azure SQL and all the new stuff coming to Azure.
You can find him on LinkedIn.