
This is part 4 of my series on ‘Automatic TeslaCam And Sentry Mode Video Processing In Azure’. Check out the overview post if you have not done so already. In this post, I describe the Azure Function App that orchestrates the processing of the videos using the Azure Batch service. And you will of course create your own solution along the way. When in doubt, drop a question in the comments!
Request quota increase for low-priority vCPUs
Before we start with the interesting parts, we first need to request a quota increase to be able to use Low-priority vCPUs for our processing. Don’t worry this request will not take very long (depending on how busy the Microsoft Support Engineers are). It might already be approved before you reach the end of this blog post.
If you want to use dedicated Dv3 vCPUs (more expensive) and are confident you can edit my code to accommodate that change, you can skip this quota increase request.
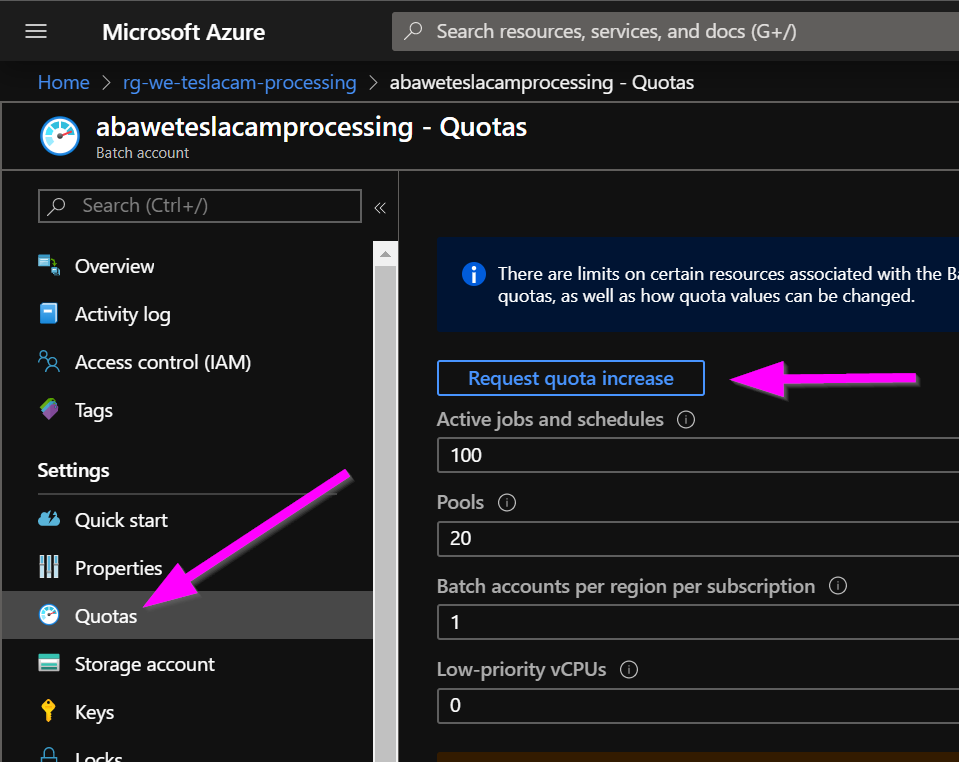
Please navigate to your Azure Batch account and click on Quotas on the left, then click on Request quota increase:
Now you will start a new support request. Select ‘Service and subscription limits (quotas)’ as the Issue type, and ‘Batch’ as the Quota type:

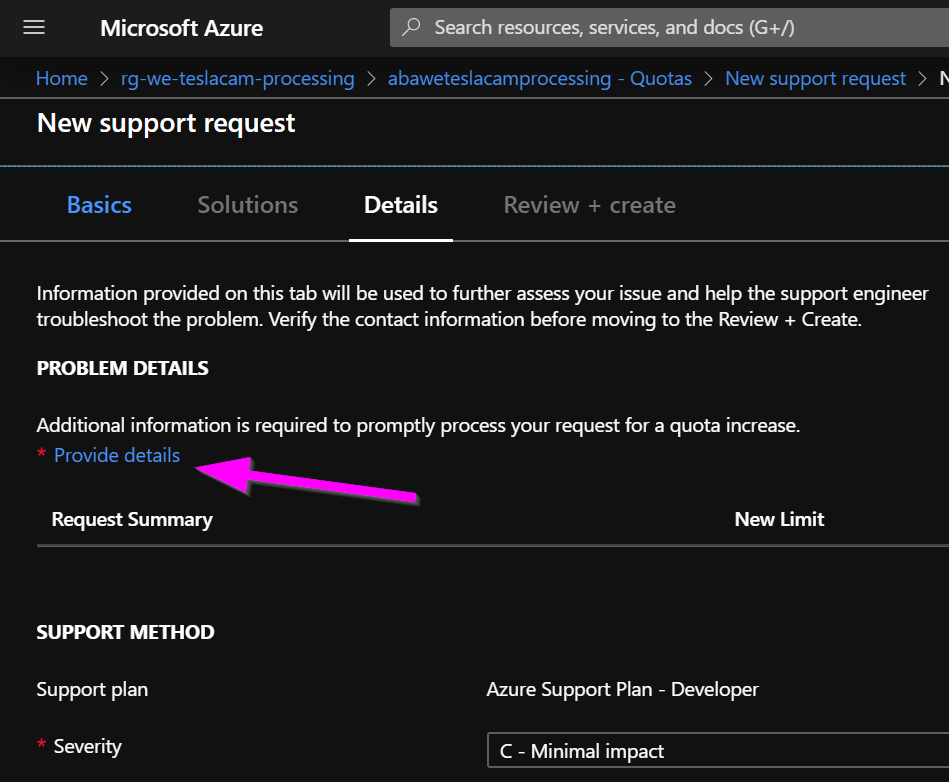
On the next page, click on ‘provide details’:
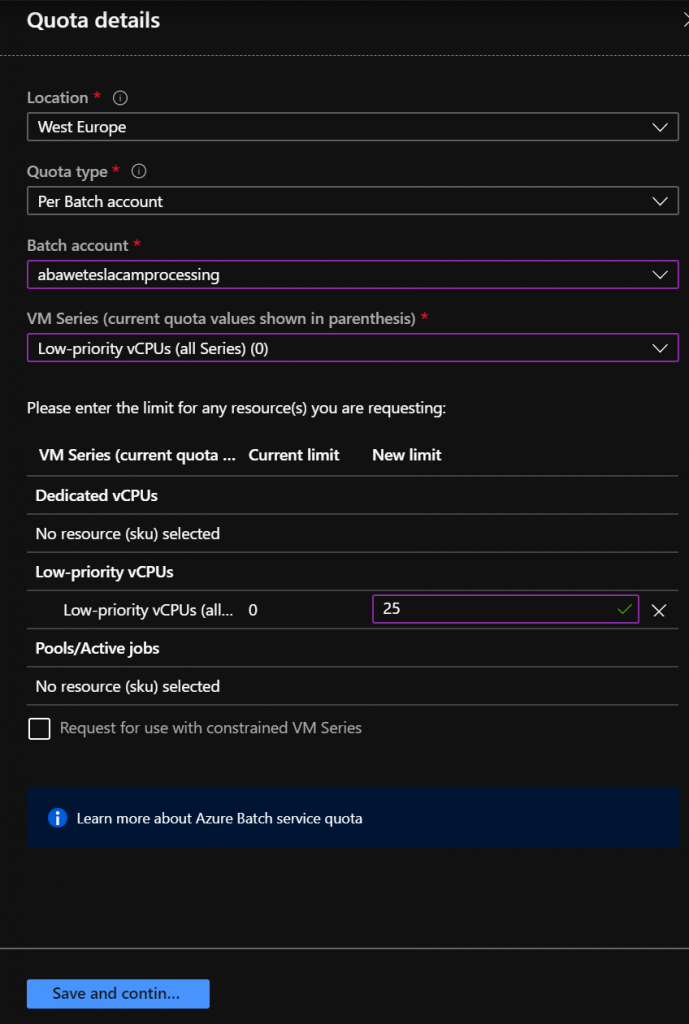
And in the panel on the right, specify your values like this:
Now save and submit your support request.
Local development environment
In the previous part, you created the Azure Function App already. Now let’s get our code into that app! We’ll use Visual Studio Code for that. Please follow the steps described in the Configure your environment documentation section: https://docs.microsoft.com/en-us/azure/azure-functions/functions-create-first-function-vs-code?pivots=programming-language-python#configure-your-environment.
- Make sure you install Python 3.7, and not 3.8. Normally I’d say the last version is better, but for Python that is NOT the case. And for this project, you will run into compatibility issues if you don’t use 3.7.
- Make sure you add Python to the PATH (you can select this on the first page of the Python installation wizard).
- For node.js, install the one that says “LTS”.
Download Git
You are going to clone my project from GitHub. To be able to do this, you need Git installed. So please download the latest version of Git here: https://git-scm.com/download/win.
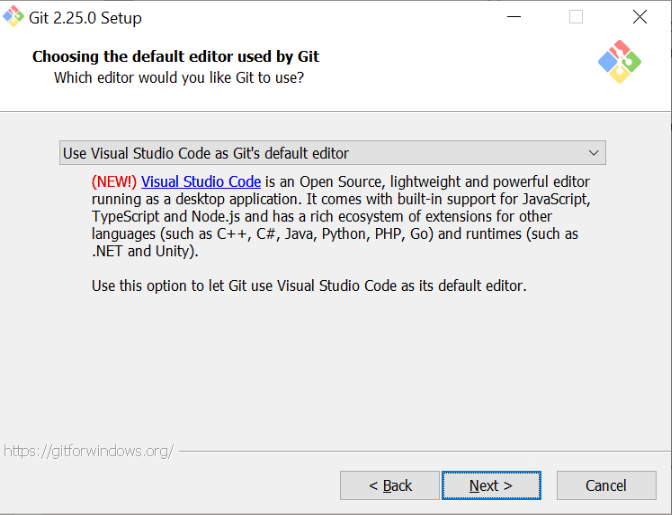
During the install wizard, you might want to specify to use Visual Studio Code as Git’s default editor (not required):
Clone project locally
After you have installed Git, make sure you restart Visual Studio Code.
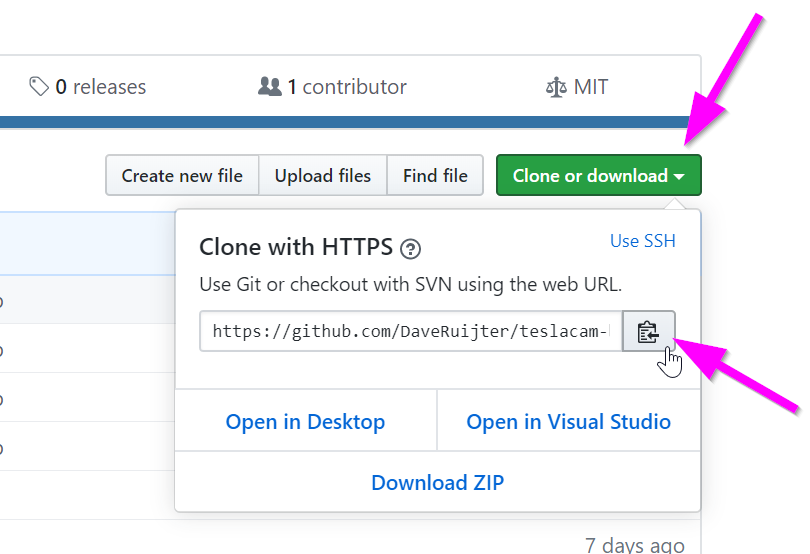
Go to my teslacam-batch-orchestration project on GitHub, and copy the git URL:
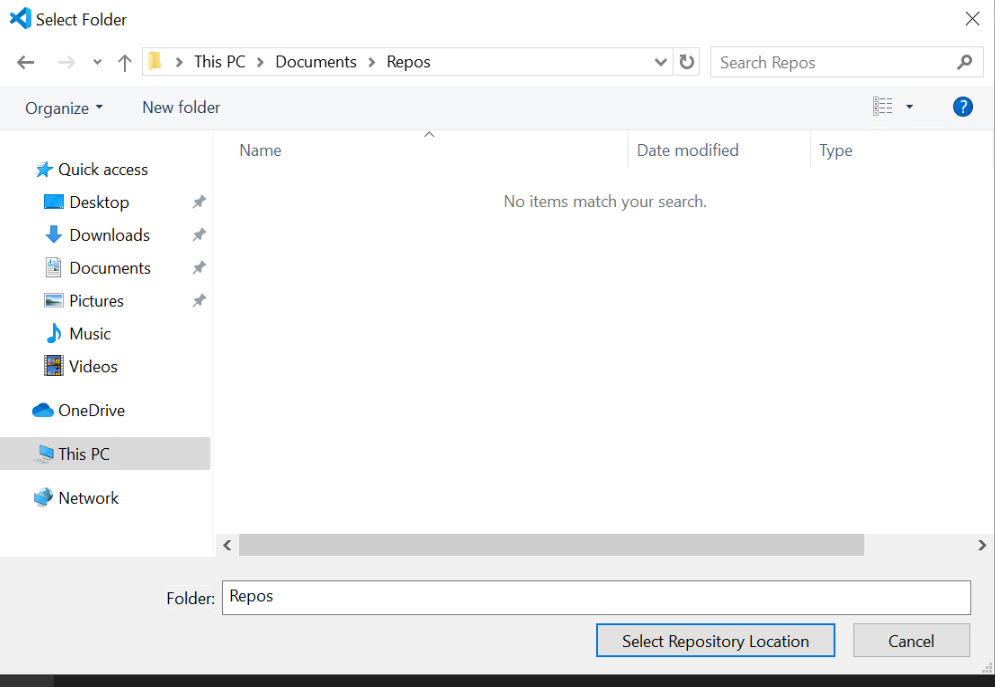
Now in Visual Studio Code, clone the Git repository with the Git: Clone command in the Command Palette (Ctrl+Shift+P). You will be asked for the URL of the remote repository and the parent directory under which to put the local repository.

As you might use other GitHub projects in the future, it might be a good idea to create a Repos folder somewhere, and select that as your Repository Location.
Choose Open, after the clone is ready.

Take a look at the code
You can skip this paragraph, and go to the next one, but if you are interested in what is happening under the hood, and want to take a look at the code, you can now open the __init__.py file:

- While creating the Batch Pool:
- I set the maxNumberofVMs to 25, so even if the script wants to create more, it is capped to this amount.
- You can see I set the variable target_low_priority_nodes, this could also have been dedicated nodes (more expensive) or both. More info on that in the Azure docs.
auto_scale_formula='''// Sets the initial pool size to 4 nodes.
initialPoolSize = {poolsize};
$TargetLowPriorityNodes = initialPoolSize;
// "Mon, 06 Oct 2014 10:20:00 GMT" represents the datetime that this autoscale formula starts to evaluate. This is an arbitrary value here.
lifespan = time() - time("Mon, 06 Oct 2014 10:20:00 GMT");
// Representing 15 minutes
span = TimeInterval_Minute * 15;
// Representing 10 minutes
startup = TimeInterval_Minute * 10;
ratio = 50;

// After 10 minutes, obtains the max value of the number of running and active tasks within the past 15 minutes.
// If both values are 0 (indicating that no tasks were running or active in the last 15 minutes), the pool size is set to 0.
// If either value is greater than zero, no change is made.
$TargetLowPriorityNodes = (lifespan > startup ? (max($RunningTasks.GetSample(span, ratio),
$ActiveTasks.GetSample(span, ratio)) == 0 ? 0 : $TargetLowPriorityNodes) : initialPoolSize );
$NodeDeallocationOption = taskcompletion;'''.format(poolsize=pool_size, now=datetime.datetime.now())- I also specify a Batch Pool start_task command_line. It took me quite some time to get this working. And, probably this could be optimized and cleaned. But, you know what they say: “if it ain’t broke, don’t fix it“.
As you see I’m installing ffmpeg, python, the tesla-dashcam library, and its prerequisites:
command_line="/bin/bash -c \"add-apt-repository ppa:deadsnakes/ppa && apt-get update && apt-get install -y ffmpeg python3.7 python3.7-venv python3.7-dev && apt-get install -y python3-pip && apt-get install -f && python3.7 -m pip install --upgrade pip setuptools wheel && pip3 install python-dateutil && pip3 install psutil && pip3 install requests && pip3 install tzlocal && pip3 install tesla-dashcam\""- The most interesting thing about the Batch Job is that it is created with an option to automatically terminate when all tasks are completed. This is important because in a single Azure Batch account you can only have a limited amount of ‘active’ jobs. So you need to complete/terminate them!
on_all_tasks_complete=batchmodels.OnAllTasksComplete.terminate_job,- Of course, the actual Batch Task command_line is also interesting to take a closer look into. You might want to tweak this to your preferences:
command = '''tesla_dashcam --no-timestamp --monitor_trigger {input} --output {output} --motion_only --mirror --layout DIAMOND --fps 33 --quality HIGH --slowdown 5'''.format(input=input_file_dir, output=output_file_path)- You can see I call the script tesla_dashcam with these parameters:
–no-timestamp
Do not display timestamp within the resulting video.
–monitor_trigger {input}
Monitor for existence of a folder (or file) instead of a drive with TeslaCam folder. Once the file (or folder) exist then processing will start. If source is provided then that will be used for scanning for events and clips. If no source was provided then the path provided for this parameter will be used as source instead. If the provided source is a relative path (i.e. Tesla/MyVideos) then it will be relative based on the location of the trigger file/path.
Upon completion, if a trigger file was provided then that file will be deleted and the program will wait again until the trigger file exist again. If a trigger folder was provided then the program will wait until this folder has been removed. Then it will start monitoring again for existence for this folder.
–output {output}
Path/filename for the resulting video. If a filename is provided here and –merge is set then the resulting merged video will be saved with this filename. The event videos will be stored within the same folder.
–motion_only
Resulting video will show fast forwarded video for any portion where there is no or very little motion. This can be especially useful for Sentry events since those are 10-minute events but often only have a few minutes (if that) of useful activity in it that resulted in the event being created.
–mirror
By default the left, right, and rear cameras are shown as if one is sitting inside the car and looking through the mirrors. However, if the front camera is not included (with option –no-front) then this is changed making it seem as if one is looking backwards and not through a mirror. With option –mirror or –rear one can override the default for this.
Using –rear you can thus make it so that it is shown as if looking backwards yet still having the front one shown. Same, using –mirror one can make it as if the view is shown through a mirror without showing the front camera.
–layout DIAMOND
This creates the following layout, I like this one (check out the others!):
+---------------+----------------+----------------+
|               |  Front Camera  |                |
+---------------+                +----------------+
|   Left Camera |----------------| Right Camera   |
+               +  Rear Camera   +                +
|---------------|                |----------------|
+---------------+----------------+----------------+
–fps 33
Default: 24
Set the frames per seconds for the resulting video. Default frames per second for movies and TV shows is 24fps. Tesla cameras are recording and saving at about 33fps. Using default about 9 frames per second are dropped from the resulting video. With this parameter the fps for the resulting video can be adjusted. Set it to 33 to keep the number of frames similar to Tesla’s. Setting this value higher would just result in frames being duplicated. For example, setting it to 66 would mean that for every second, each frame is duplicated to get from 33fps to 66fps.
–quality HIGH
Default: LOWER
Set the overall quality for the resulting video. Setting this to a higher value can improve the quality (not guaranteed) but most likely will also result in bigger file sizes. Resulting improvement might not be noticeable.
Valid values: LOWEST, LOWER, LOW, MEDIUM, HIGH
–slowdown 5
Slow the resulting video down by provided multiplier. For example, a <speed> of 2 would mean that the video will be half the speed of normal.
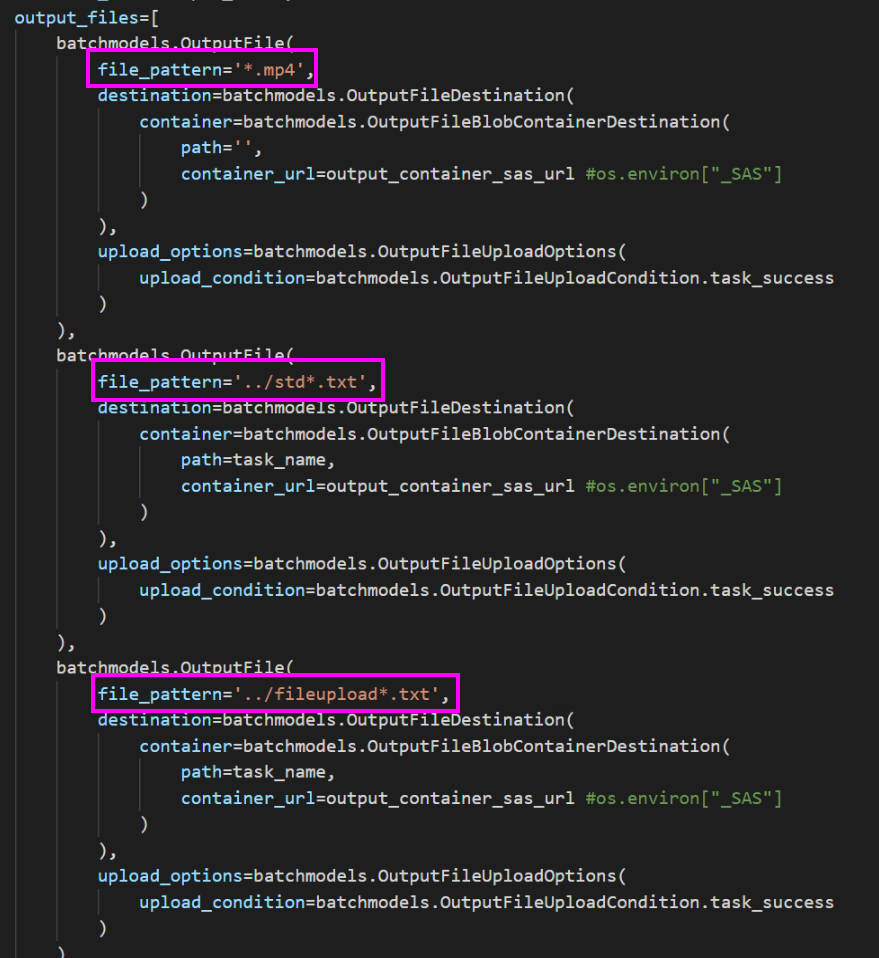
- Also in the Batch Task properties, you can see each task has 3 different output file configs. Of course, the .mp4 output file of the script is configured, but I’m also outputting the std log files (stdout/stderr), and the fileupload logs. These can be extremely helpful while debugging Batch Tasks. With this setup, all these files will be nicely saved in the Azure Storage Account.
Run Locally
In case you want to run the Function code locally, this is certainly possible. But, you will have to create a local.settings.json file. Here is an example of my file:
{
  "IsEncrypted": false,
  "Values": {
    "AzureWebJobsStorage": "",
    "FUNCTIONS_WORKER_RUNTIME": "python",
    "_BATCH_ACCOUNT_KEY": "<add your batch account key here>",
    "_BATCH_ACCOUNT_NAME":"<name of your batch account>",
    "_BATCH_ACCOUNT_URL":"<url of your batch account>",
    "_DEDICATED_POOL_NODE_COUNT":"0",
    "_JOB_ID":"DTDJobTest",
    "_POOL_ID":"DTDPoolTest",
    "_POOL_VM_SIZE":"STANDARD_A1_v2",
    "_STORAGE_ACCOUNT_KEY":"<add your storage account key here>",
    "_STORAGE_ACCOUNT_NAME":"<your storage account name>"
  }
}
Publish Function to Azure
To publish the function to Azure (into your previously created Azure Function App) you click on the Azure menu option on the left, and then click on the Upload button:
You might have to log in, but it will ask/guide you.
Then you choose the subscription (if you have more than 1):
and the correct Function App: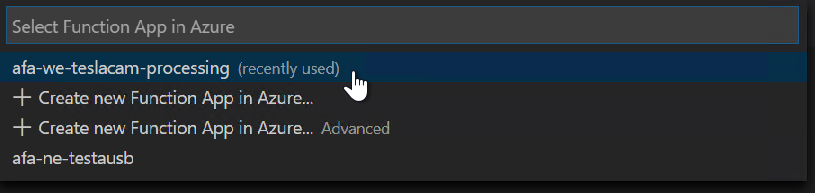
It might ask you to overwrite existing code, choose yes.
Configure the Azure Function App
Before we can actually configure the app, let’s grab the values we need to configure first. We need these five values, I suggest you grab notepad and copy-paste away:
- Batch Account Name.
Navigate to your Batch account in the Azure Portal (https://portal.azure.com). Open it, and click on Keys on the left to open the Keys blade: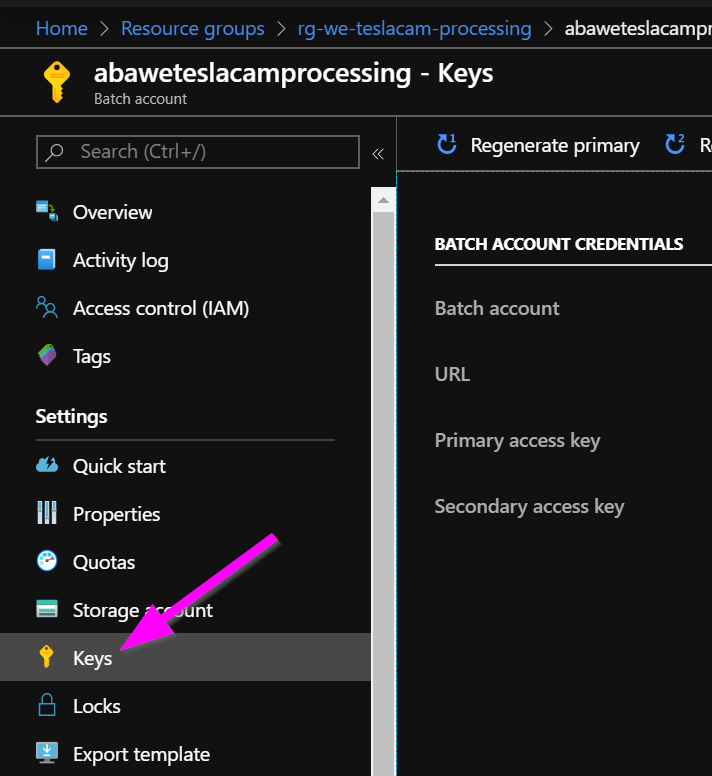
You will see the Batch Account Name here, copy it to your notepad with a note that this is the Batch Account Name. - On this same page, you also see the URL, copy it to your notepad with a note that this is the Batch Account URL.
- On this same page, you also see the Primary access key, copy it to your notepad with a note this is the Batch Account Key.
- Now navigate to the Storage account. Open it and click on Access keys on the left to open that blade:
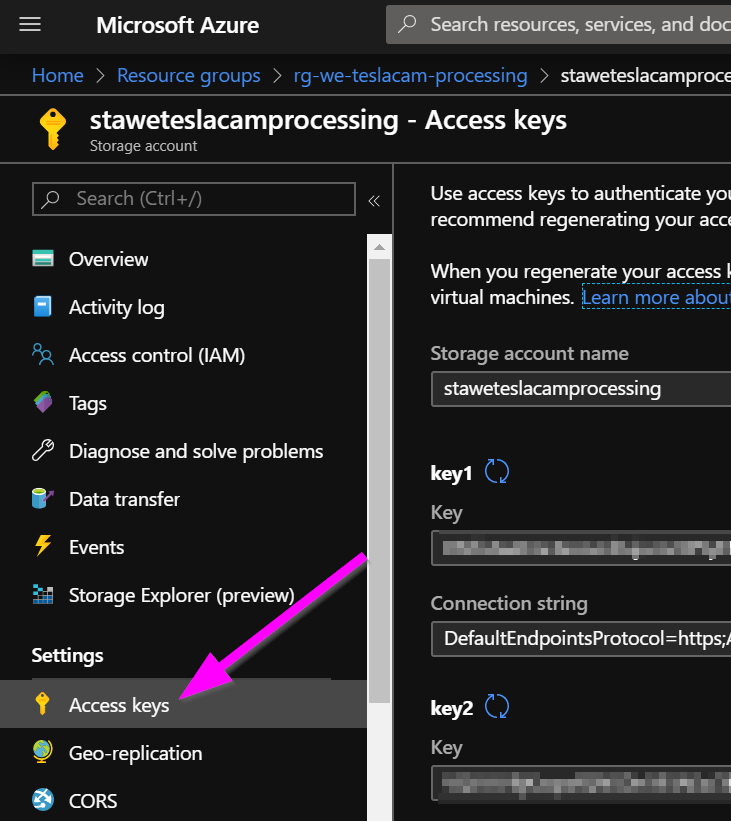
You will see the Storage account name here, copy it to your notepad with a note that this is the Storage Account Name. - On this same page, you also see the value of key1, copy it to your notepad with a note this is the Storage Account Key.
Now let’s configure your Azure Function App! Navigate to it, and open it: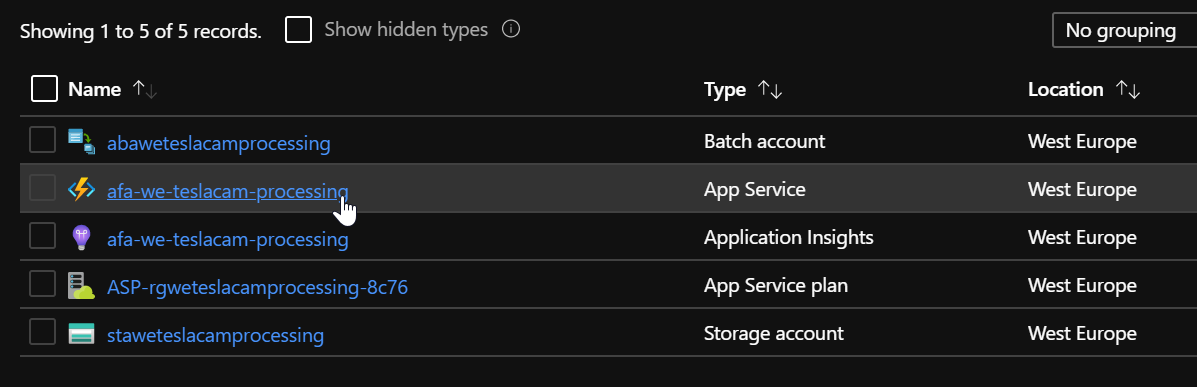
Open the Configuration page of the Function App: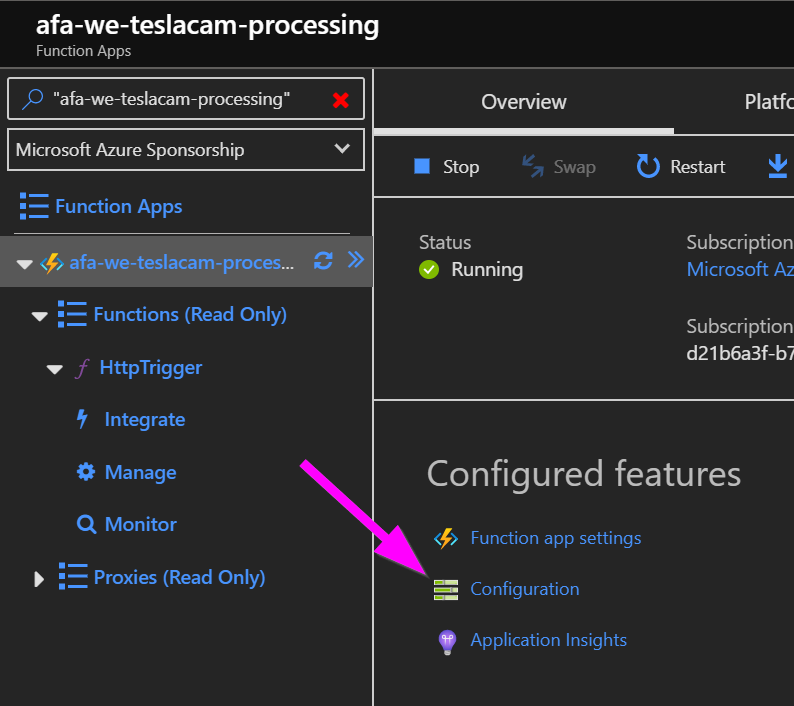
Now click on the +New Application Setting option: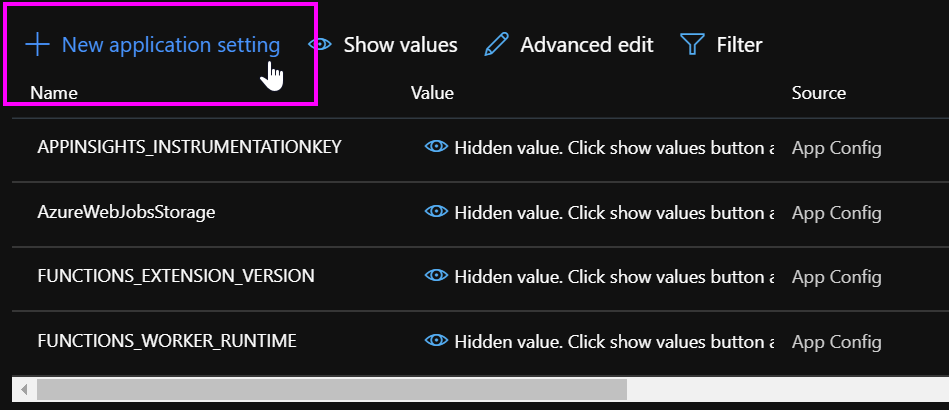
And add the following settings:
- _BATCH_ACCOUNT_KEY
Put the value of your Batch Account Key here. - _BATCH_ACCOUNT_NAME
Put the value of your Batch Account Name here. - _BATCH_ACCOUNT_URL
Put the value of your Batch Account URL here. - _STORAGE_ACCOUNT_KEY
Put the value of your Storage Account Key here. - _STORAGE_ACCOUNT_NAME
Put the value of your Storage Account Name here. - _JOB_ID
Give it the value: DTDJob. - _POOL_ID
Give it the value: DTDPool. - _POOL_VM_SIZE
Give it the value: STANDARD_A1_v2.
Now save the page!
Test it!
You can now test your Function App! If you have already set up the Raspberry Pi in your Tesla, it probably has uploaded some footage in the Azure Storage Account ‘teslacam’ container:

You can manually upload some test files, but be sure you create a root folder called ‘SentryClips’, and then a subfolder with the date and time, and then at least 4 clips.
Navigate to your Azure Function App, and open the HttpTrigger on the left. Click on the Run button:
To see if it was successful, and check the logs, click on Monitor on the left. You will see the status of each run.
Click on the run. A panel should open up on the right with the logs.
Remember, this function app only creates the Batch Pool, Job, and Tasks. Then, after some archiving, it finishes because it has done its job. But, now the actual file processing is starting on the Batch account! This function app will have no clue of the actual status of the Batch account processing.
Monitor Batch progress
If you want to monitor the progress of the file processing in the Azure Batch account, navigate to your Batch account resource, and click on Pools to open the Pools blade. There you will see the DTDPool, with the current amount of nodes etc.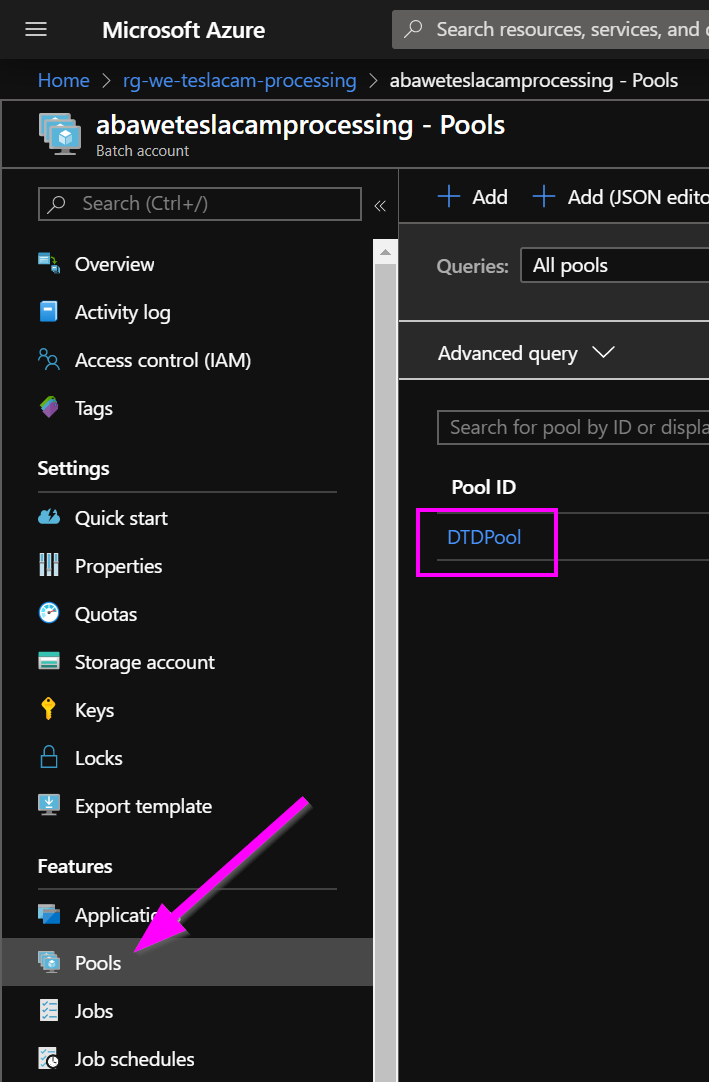
You can monitor the tasks if you click on Jobs on the left, and open the current DTDJob: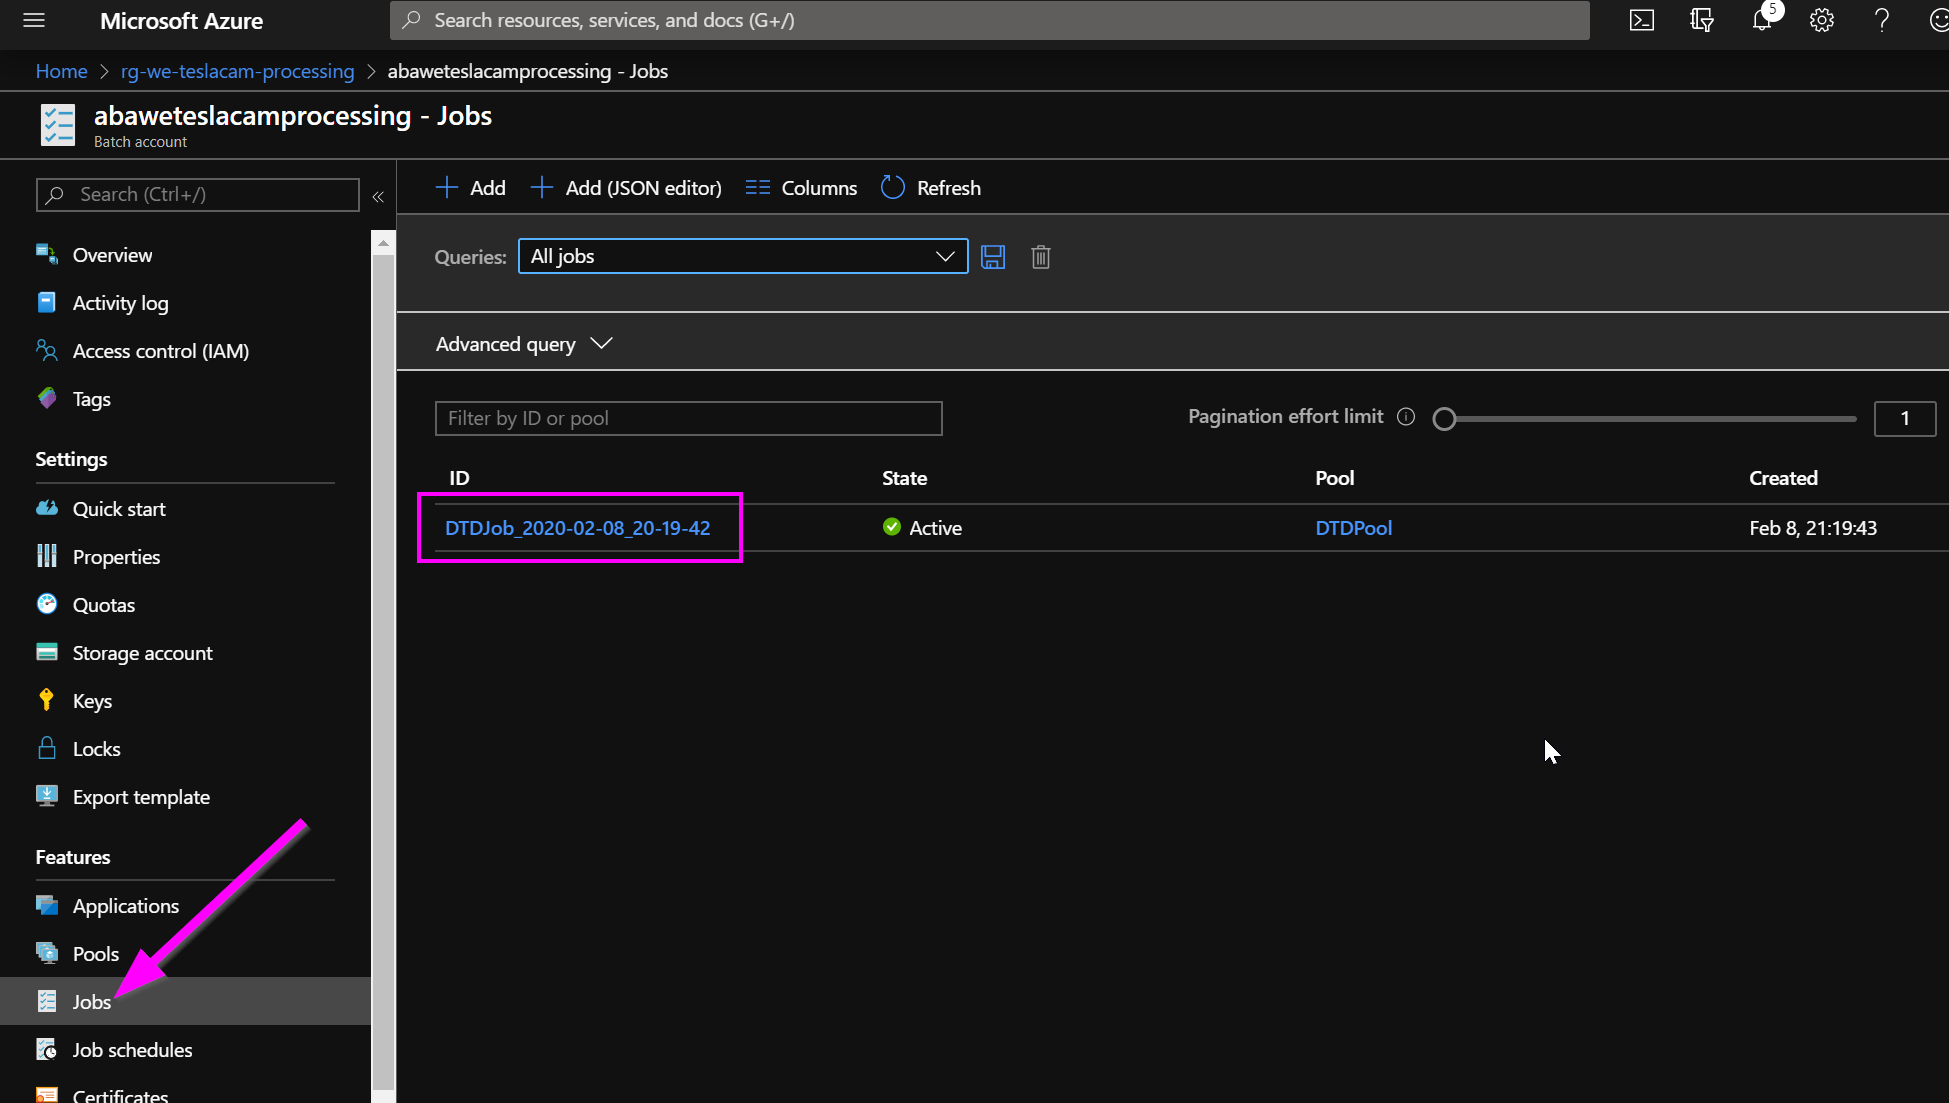
Then click on individual tasks: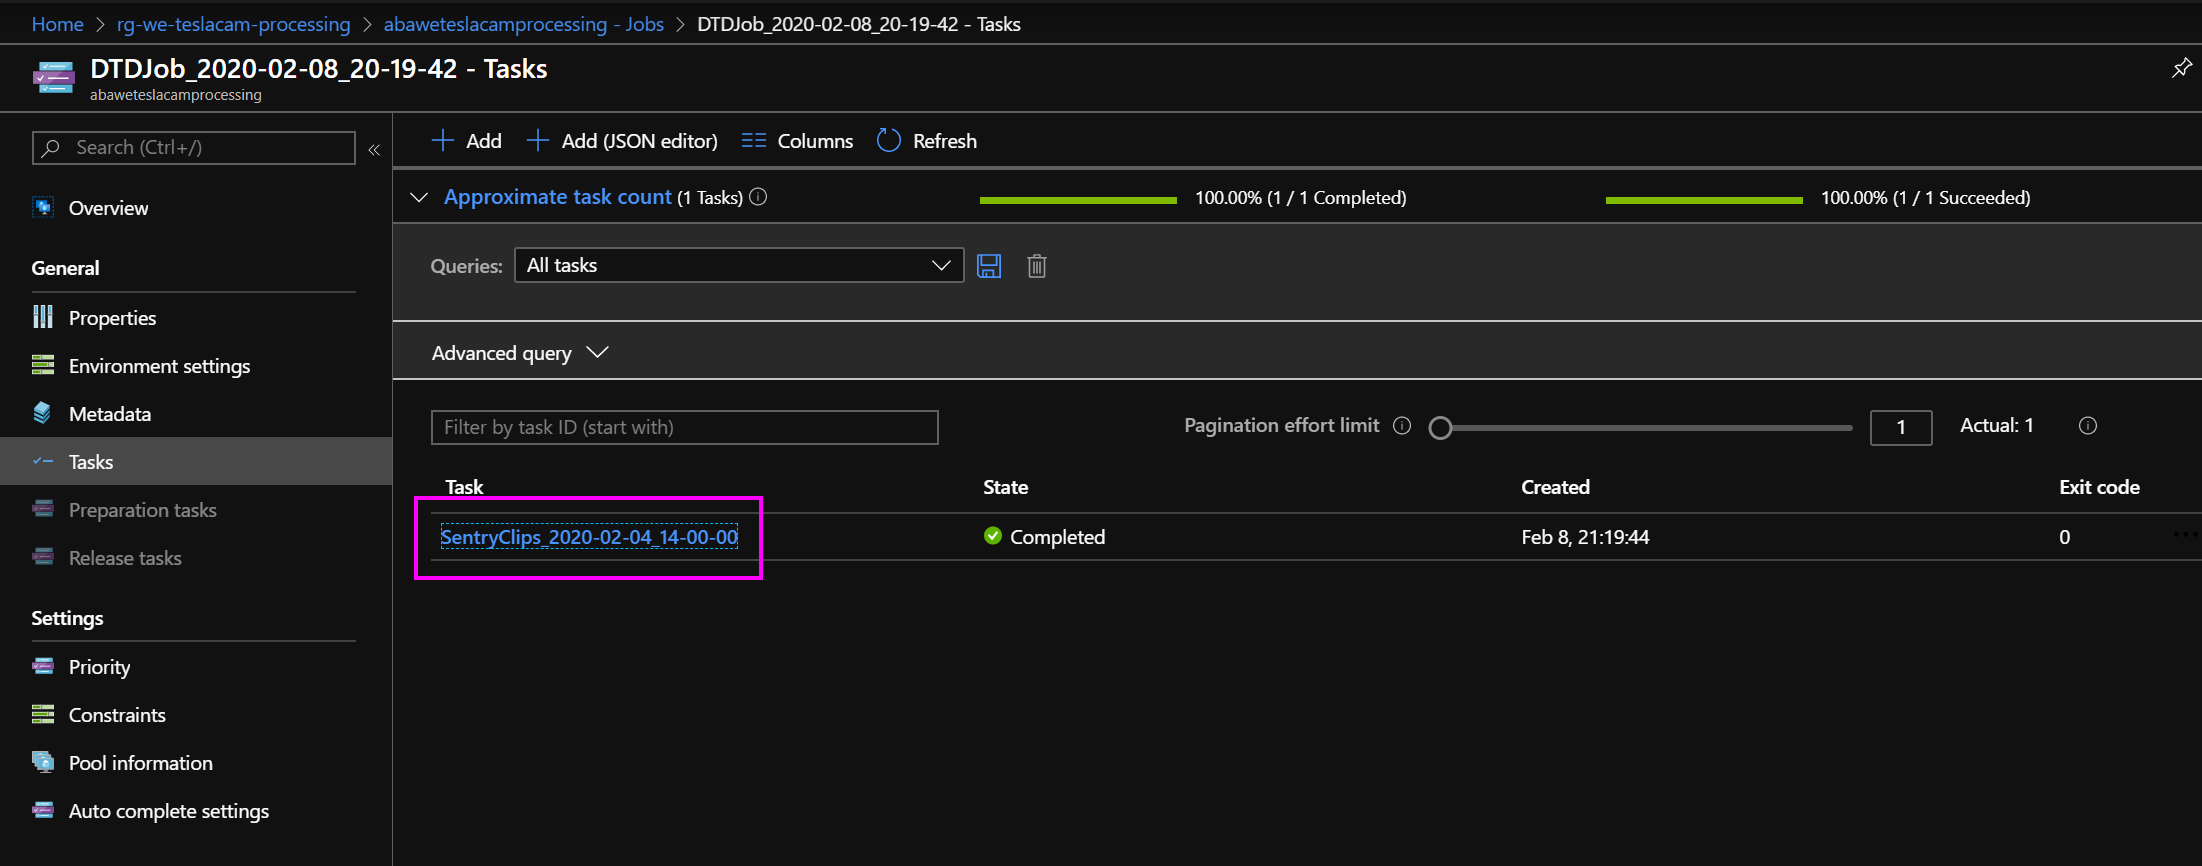
An overview of a successful task looks like this: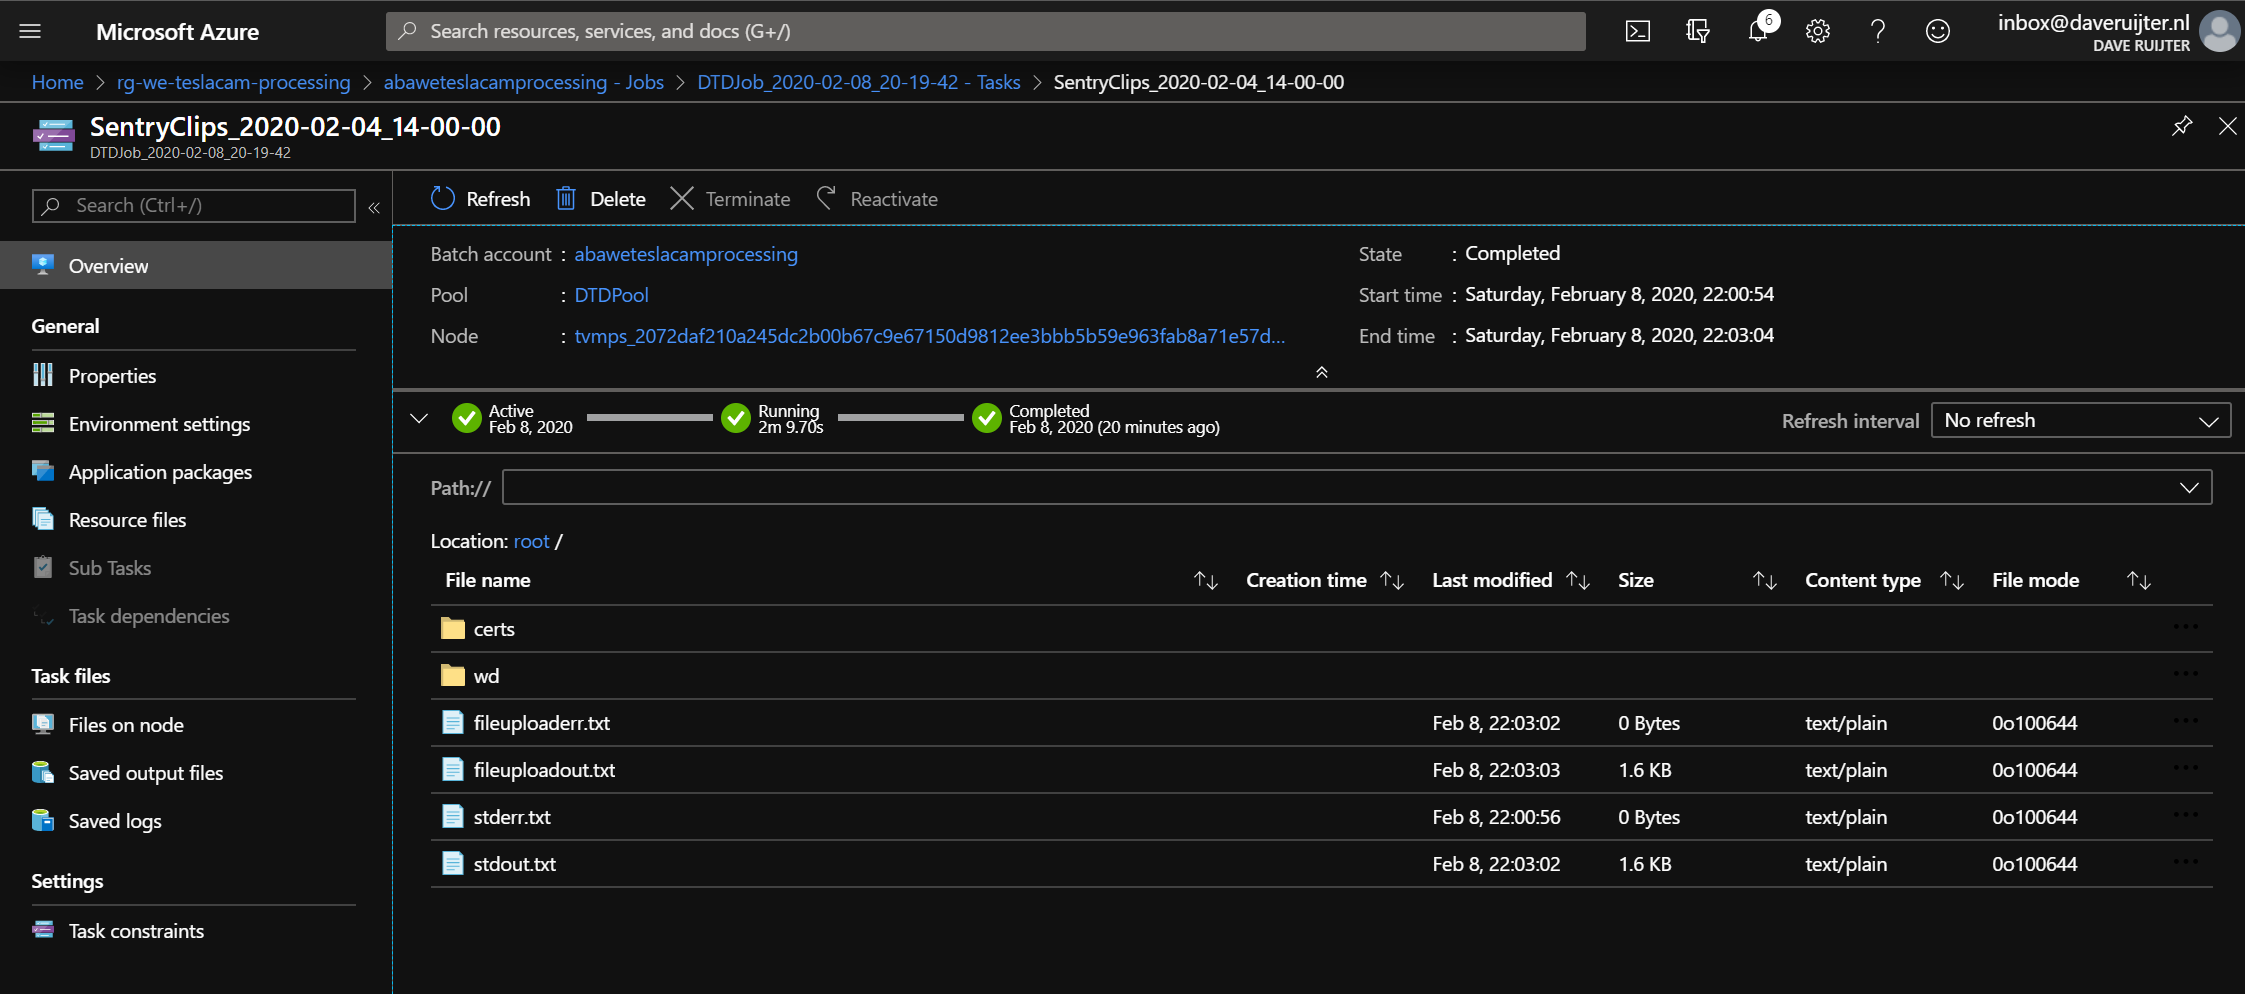
And if you would drill into the wd folder you would see the new .mp4 file that was created.
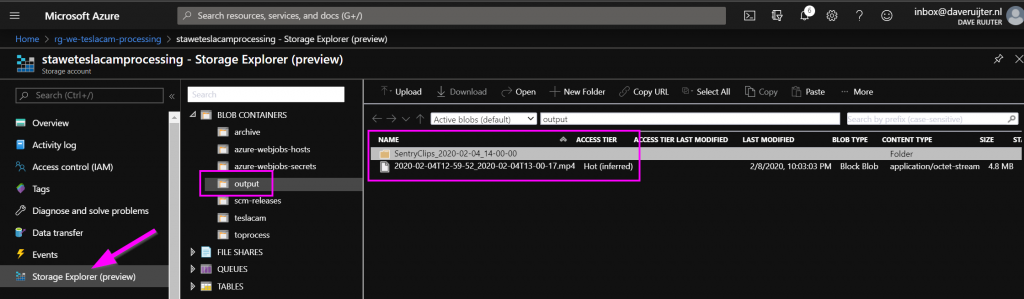
You can now see the result of the task in the output container on your Azure Storage Account! The .mp4 file output of the script will be in the root of the container, and there will be a folder with the name of the event, containing the logs.
Wrap up
Great job! You have now got yourselves an automatic processing engine for your TeslaCam and Sentry Mode footage!
Do you see improvements in the Azure Function App? Feel free to drop a comment below, or submit a Pull Request in my teslacam-batch-orchestration GitHub project. That’s also the best place if you encounter any issues with the Function App.
In the next blog post, we will make sure that your Azure Function App is automatically called when the upload of all clips from the Raspberry Pi is finished!
Interesting links
- https://docs.microsoft.com/en-us/azure/batch/batch-automatic-scaling
- https://docs.microsoft.com/en-us/azure/batch/best-practices
- https://docs.microsoft.com/en-us/azure/azure-functions/functions-create-first-function-vs-code?pivots=programming-language-csharp
- https://github.com/ehendrix23/tesla_dashcam
- https://docs.microsoft.com/en-us/python/api/azure-batch/azure.batch.models.jobaddparameter?view=azure-python
- https://docs.microsoft.com/en-us/azure/batch/batch-api-basics
Hey Dave
Aan het experimenteren nu met de free trail.
Een quota increase lukt daarbij niet.
Kan ik dit (trager) runnen zonder de quote increase?
Hi, ik denk het wel. Kun je eens kijken bij de quota cijfers in je Batch Account?
Welke waarden zie je bij “Low-priority vCPUs” en welke bij “Total dedicated vCPUs”?
En bij welke VM Series zie je een Quota anders dan ‘0’ staan?
Dan kunnen we daarmee kijken welk type VM je kunt inzetten, en hoeveel tegelijk.
Hi Dave,
Thanks for the great work – been avidly following this. I have run through this once when I run it manually a second time “Reason: ResizePool cannot be issued on an AutoScaled enabled pool” If I go into the pool > scale pool and set it to Fixed it runs through or if I delete the pool and let the script recreated it?
Van
Hi Van, thanks for reading, glad you like it!
It’s probably a bug indeed! I’ll try to repro over the weekend and update the code.
Meanwhile, I think you can remove or comment these lines in the function code to make it work:
else:
logging.info(‘Pool already exists! Resizing..’)
pool_resize_parameter = batch.models.PoolResizeParameter(
target_dedicated_nodes=0,
target_low_priority_nodes=pool_size
)
batch_service_client.pool.resize(pool_id, pool_resize_parameter)
This looks great. Any idea what the typical Azure cost would be per month?
Hi Geoff, thanks for reading!
Hard to say exactly what the montly cost would be. You can use the Azure cost calculator to make your own estimation: https://azure.microsoft.com/en-us/pricing/calculator/.
It will be about the amount of hours you run the low-priority machines per month (couple of dollars in my case), and the total amount of data in the storage account (also a couple of dollars in my case).
For the storage account it is important to keep an eye on the archive folder, as that will continue to grow if you don’t delete old data.
Geweldig project Dave,
Ik heb het draaien t/m deel 4. Is deel 5 al uit, of ben je daar nog mee bezig.
Ook leuk om op deze manier Azure verder te ontdekken voor mij.
Hoi! Dankjewel dat is heel leuk om te horen 😃. Ik ben nog met deel vijf (en verder) bezig.
Hi Dave
Is deel vijf al gelukt? Heb veel zin om hier opnieuw in te duiken!
Hi Kenneth,
Nee, nog niet!
Maar, de essentie is dit. Ik gebruik IFTTT, waarin ik een ‘developer account’ heb gemaakt, omdat ik dan de benodigde applet kon maken.
Het is een hele simpele applet, die als trigger een web request heeft. Die stel je in TeslaUSB in, zodat die webhook wordt aangeroepen door TeslaUSB.
Dan is de actie in de applet dat ik de webhook van de Azure Function aanroep.
Maar, terwijl ik dit opschrijf heb ik even gekeken in min IFTTT account en het zou ook goed kunnen dat ze hun voorwaarden hebben gewijzigd en de boel niet meer zo eenvoudig mogelijk is.
Als ik weer met de Tesla op pad ga, en weer actief gebruik ga maken van dit project, zal ik een nieuwe blog post toevoegen.
Je kunt mij altijd even mailen met vragen :).
Cheers,
Dave
Have you made the post about setting up IFTTT?
Any update on this? Are you still using this and how are the costs?
I must confess that I am currently not using it. It was not stable enough.